Easter 3D Shadow Box Paper Cut: A Guide to Perfecting Your Spring Creations
Easter Day is a celebration of joy, hope, and new beginnings, marking the arrival of spring with vibrant colors and traditional symbols. For crafters, designers, and small business owners, capturing this specific feeling in a tangible project can be both rewarding and challenging. The Easter 3D Shadow Box Paper Cut design offers a sophisticated solution for those seeking something unique for their crafting projects, gift cards, or home decor. By layering intricate paper elements, you create depth and dimension that flat images simply cannot achieve. However, moving from a digital file to a stunning physical display requires more than just downloading a template; it demands an understanding of how these layered designs function and common pitfalls that can undermine your final result.
Understanding the Value of Layered Designs
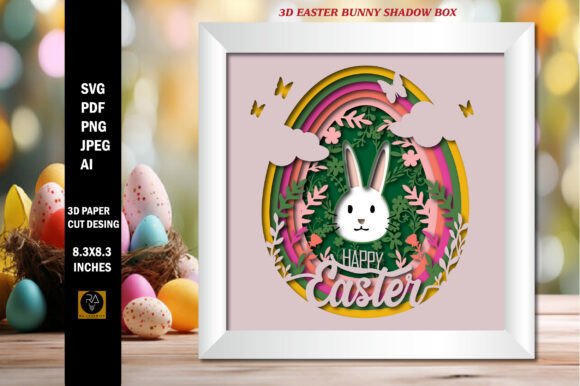
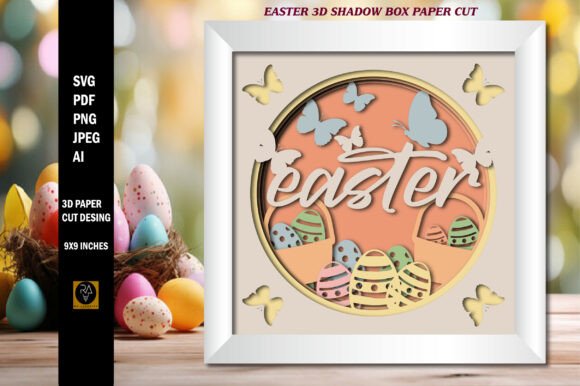
The appeal of an Easter 3D Shadow Box Paper Cut Layered template lies in its ability to transform simple paper into a window-like scene. Unlike standard cut files that sit on a single plane, shadow boxes utilize multiple layers—this specific design features 8 distinct layers—to create a sense of distance and perspective. When executed correctly, the spacing between these layers allows light to play across the edges, highlighting the freshness of spring flowers, bunnies, and eggs in a way that feels alive.
For entrepreneurs and marketers, this depth adds significant value. A flat greeting card might be overlooked, but a 3D shadow box stands out as a premium product. It signals effort and quality, making it an excellent choice for high-end gift cards or boutique packaging. Yet, many creators underestimate the technical requirements needed to maintain that crisp, professional look when scaling or assembling these complex files.
Common Mistakes That Ruin Shadow Box Projects
Even experienced crafters can stumble when working with multi-layered templates. One of the most frequent errors involves misunderstanding the relationship between file format and cutting precision. Many users download a raster image, such as a JPEG or PNG, assuming it is sufficient for laser cutting or vinyl weeding. While the included PNG raster files at 300ppi are perfect for printing or visual reference, they lack the mathematical paths required for clean cuts. Attempting to cut from a raster image often results in jagged edges, lost details, and wasted material.
Another overlooked detail is the assumption that "digital" means "instantly ready." Because these are only digital files, no physical item will be shipped. This distinction is crucial for buyers expecting a pre-assembled kit. The responsibility falls entirely on the user to source the correct materials. Choosing the wrong paper weight can be disastrous; if the paper is too thick, the eight layers may not fit within a standard 9-inch frame, causing the box to bulge or the lid to fail. Conversely, paper that is too thin will collapse under its own weight, losing the structural integrity required for the 3D effect.
How File Formats Impact Your Workflow
To avoid frustration, it is essential to understand which file format serves which purpose in your workflow. This template set provides five formats: SVG, Ai, PDF, JPEG, and PNG. Each plays a specific role, and using them incorrectly can halt your progress.
- SVG (Scalable Vector Graphics): This is the most critical file for cutting machines like Cricut or Silhouette. SVGs allow for unlimited resizing with no quality loss. If you need to adjust the size of your Easter design to fit a non-standard frame, the SVG ensures the lines remain sharp and the geometry stays true.
- Ai (Adobe Illustrator): Ideal for professionals who need to edit individual elements, change colors, or rearrange layers before sending the file to a cutter. This format preserves the vector data necessary for high-precision manufacturing.
- PDF: Excellent for maintaining layout fidelity when printing instructions or sharing with collaborators who do not have design software.
- JPEG and PNG: These are best used for mockups, social media previews, or printing onto pre-cut shapes. They should never be used as the primary source for cutting paths.
Using a low-resolution JPEG to scale up a design for a large shadow box will result in pixelation and blurry edges, destroying the professional finish you aim for. Always start with the vector files for any physical production.
Practical Advice for Flawless Execution
Before you commit to cutting your first batch, take a moment to evaluate your setup against the template's specifications. This design is created with a Height of 9 inches and a Width of 9 inches. Ensure your cutting mat and machine bed can accommodate this size without requiring you to split the design, which introduces alignment errors. If you plan to resize the project, remember that reducing the size too much can make the delicate inner layers impossible to weed or assemble by hand.
Material selection is equally important. For an 8-layer shadow box, you need paper that holds its shape but remains easy to score. Cardstock ranging from 65lb to 110lb is typically the sweet spot. Thicker boardstock might require specialized scoring tools to prevent cracking along the fold lines. Additionally, consider the adhesive method. Standard glue sticks can warp thin paper layers. Double-sided tape or foam adhesive dots are often better choices, as they help maintain the precise spacing between layers that creates the illusion of depth.
What to Check Before You Download
When evaluating an Easter 3D Shadow Box Paper Cut template, look beyond the pretty preview images. Verify that the listing explicitly states the dimensions and the number of layers. A design promising "3D effects" with only two layers will rarely achieve the dramatic depth of an 8-layer construction. Furthermore, confirm that the original images are provided without watermarks. Watermarked files are useless for commercial products or professional presentations, as they immediately signal a low-quality or unauthorized use.
Also, check the resolution of the raster files. The inclusion of 300ppi files indicates that the creator understands print standards. Lower resolutions, such as 72ppi, are suitable for web graphics but will appear grainy when printed on high-quality cardstock. By ensuring you have access to high-resolution vectors and rasters, you protect your investment of time and money.
Maximizing Your Creative Potential
With the right approach, this template becomes more than just a craft; it becomes a versatile asset. Beginners can use the pre-made layers to learn about spacing and assembly, while professionals can deconstruct the Ai files to create custom variations for clients. Whether you are creating a one-of-a-kind gift for a family member or producing a line of seasonal decorations for your shop, the key to success lies in preparation.
By respecting the technical requirements of vector cutting, choosing appropriate materials, and understanding the limitations of different file types, you ensure that your final product captures the true spirit of Easter. Avoid the common traps of poor scaling and mismatched materials, and you will find that the process of building your Easter 3D Shadow Box Paper Cut Layered design is as satisfying as the beautiful result it produces.